Frozen Pipe Damage: How to Spot Hidden Plumbing Problems After a Hard Winter (and When to Call a Pro)
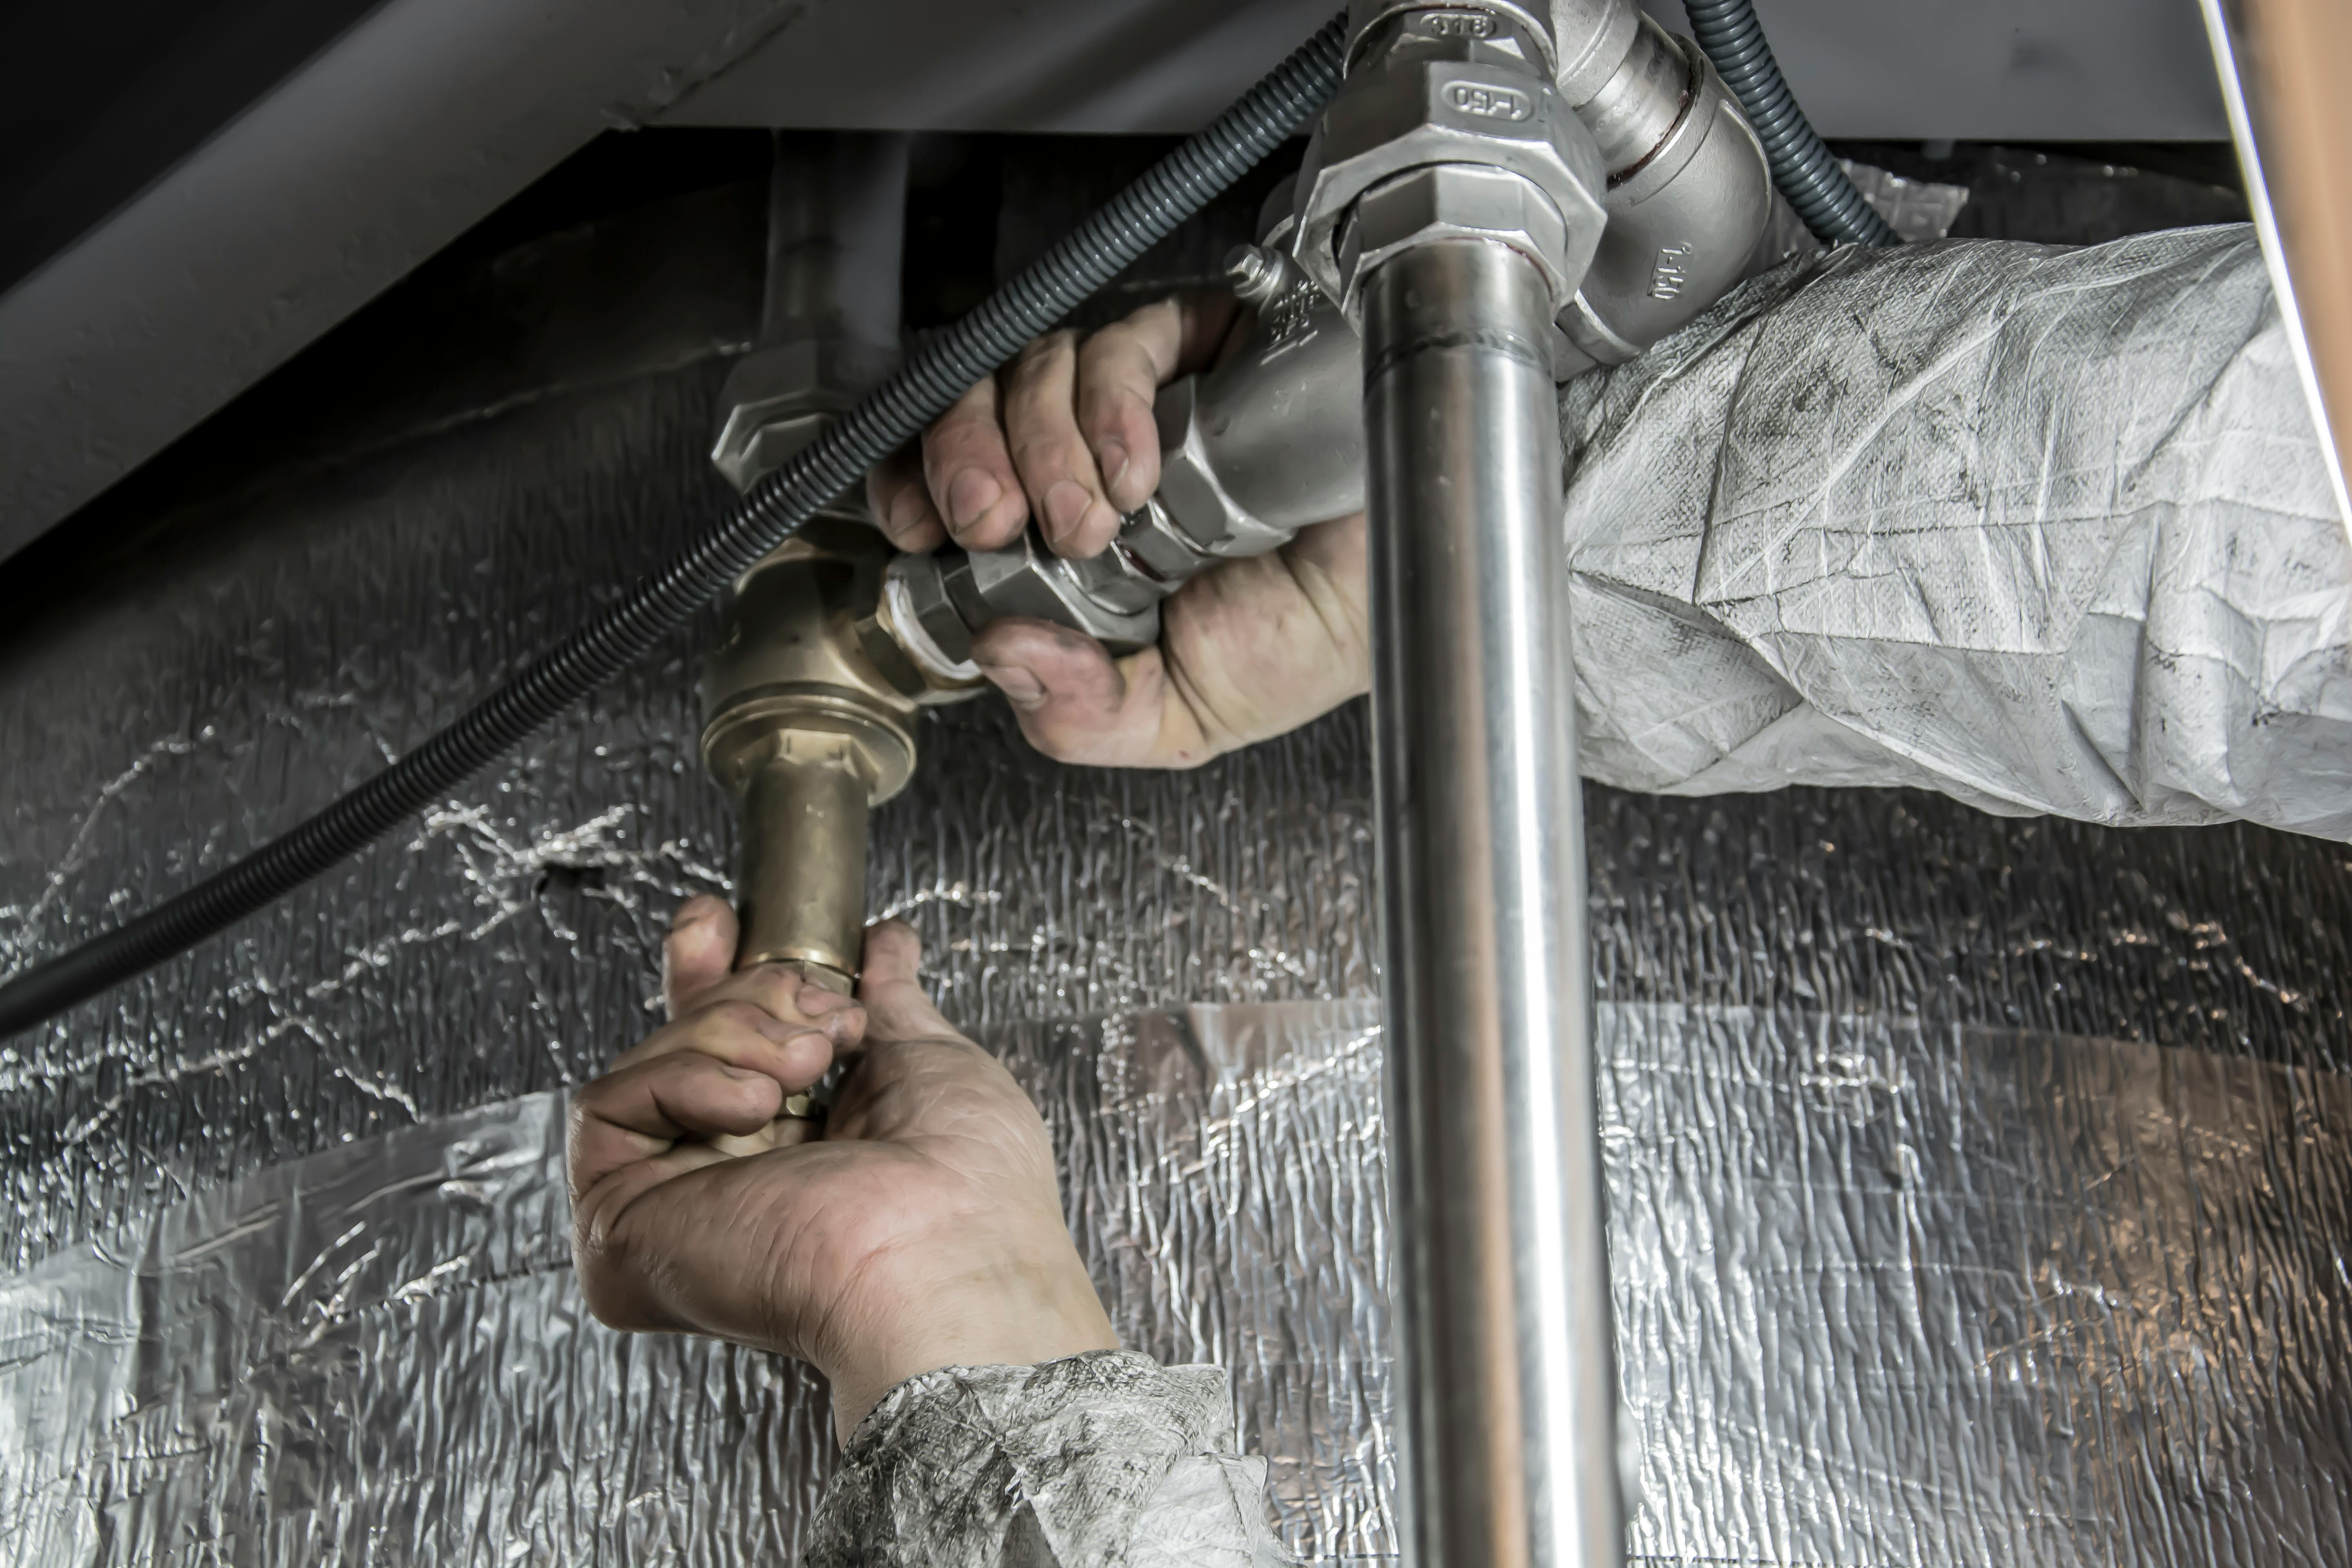
A licensed plumber inspects and tightens pipe fittings — the first step after a suspected freeze event.
The Thaw Is the Danger Zone
Here's the part nobody tells you: the freeze isn't what breaks most pipes. The thaw is.
Your home held up through the cold snap. Temps dropped hard — the kind of deep freeze that hits Indianapolis and Chicago in January and February and just sits there for days. But your water kept running, your heat stayed on, and you figured you were fine.
Maybe you are. But a hairline crack that held through the frozen stretch can let go the moment pressure returns during the thaw. You won't hear it. You won't see it. You'll find it two weeks later when there's a soft spot in your ceiling or a water stain the size of a dinner plate behind your washing machine.
That's the nightmare this article is about.
Here's the physics, fast: when water freezes, it expands about 9% in volume. Inside a sealed pipe, that expansion can generate 25,000 to 40,000 PSI of pressure — compared to the 40 PSI of your normal household water supply. Copper pipes, especially at joints and solder points, take the brunt of that. So do galvanized steel lines that have been slowly corroding from the inside for 40 years.
Indoor pipes become vulnerable at around 20°F, and it only takes 6 to 8 hours at below-freezing temps for a pipe to freeze solid. If you went through a multi-day cold snap this winter, your pipes were under stress whether you knew it or not.
If your home was built before 1980 — and statistically, there's a 60% chance it was — your pipes have been through a lot of winters. This one may have been the one that finally left a mark.
Here's what to do right now.
Signs You May Have Hidden Freeze Damage
You don't need a thermal camera to start this inspection. You need your eyes, your nose, and about 30 minutes.
What You Can See
- Water stains or discoloration on drywall and ceilings — especially on exterior-facing walls or above unheated spaces
- Bubbling or peeling paint — moisture behind a wall surface will push the paint off from underneath
- Warped or buckled flooring — hardwood and laminate telegraph water damage fast; if a section feels soft or sounds different underfoot, pay attention
- Standing water in the basement, crawl space, or under sink cabinets — obvious, but check even if you haven't been down there recently
- Frost or ice residue on exposed pipes post-thaw — if you see mineral staining or white crust around a pipe joint, water has been there
What You Can Hear
- Banging or gurgling when water runs — not normal operating sounds; air in lines post-freeze or partial blockage in a weakened section
- Rushing water sounds inside a wall — water moving where it shouldn't be
What You Can Smell
- Musty, earthy odor — mold can start growing in as little as 24 to 48 hours of standing moisture, and it often sets up inside wall cavities long before you can see it
- Sewage smell from one or more fixtures — exterior sewer lines can freeze too; if you're getting sewer odor from a drain that seemed fine before, get it checked
What You Can Feel
- Reduced water pressure throughout the house — a frozen section may have partially collapsed and is now restricting flow
- Soft spots in drywall — press gently along exterior walls; any give means moisture has been there
- Warm or damp spots on walls — especially on exterior-adjacent surfaces in the kitchen, bathroom, or laundry room
The thing to understand: water from a cracked pipe inside a wall cavity doesn't immediately show up on your floor. It pools in insulation. It wicks into floor joists. It soaks subfloor decking. You can have significant structural damage developing for days or weeks with zero visible surface evidence.
What to do right now: Walk every room. Run every faucet. Check under every sink. Don't skip the basement.

Water staining and bubbling paint on a ceiling — the telltale sign of a burst pipe above.
Your Post-Winter Plumbing Inspection Checklist
This is the walk-through. Do it now, before the weather swings again.
Basement and Crawl Space
- Look at every exposed pipe run. Check for visible cracks, joint separation, or dripping
- Feel insulation batts near pipe runs — wet insulation is heavy and discolored; dry insulation is not
- Look for rust stains or mineral deposits on concrete below pipe runs — that's where water dripped and evaporated over time
- Check the floor drain for standing water or unusual odor
Kitchen
- Run both hot and cold at the faucet — check pressure, check temp response time
- Open the cabinet under the sink: feel the cabinet floor, check for moisture staining, look at the supply line connections
- If you have a dishwasher, pull it out a few inches if you can and look at the supply line
Bathrooms
- Check under the vanity — feel for moisture, look at the supply lines to the hot and cold shutoffs
- Check the toilet supply line where it connects to the wall valve
- Flush, then watch: does the tank fill at normal speed?
Laundry Room and Utility Areas
- Check washing machine supply hoses — these are under constant pressure and are a common freeze-damage point
- Look at water heater connections: the cold supply in and hot supply out, plus the pressure relief valve
Exterior Hose Bibs
- Open the exterior spigot slowly. Water should come out of the spigot head — not from behind the siding or through the interior wall. If water appears anywhere other than the spigot, the line froze and cracked behind the wall
The Water Meter Test
- Turn off every fixture in the house — faucets, ice maker, everything
- Go to your water meter and watch the dial or digital readout for 60 seconds
- Any movement = active leak somewhere in the system

Inspect the pipes under your kitchen and bathroom sinks for signs of frost, moisture, or discoloration.
One more thing: take photos as you go. If you end up filing an insurance claim, documentation from the same day is worth a lot more than documentation from two weeks later.
What About the Pipes You Can't See?
This is where DIY stops and a professional starts to earn their rate.
Pipes inside finished walls, beneath a concrete slab, and running through ceiling cavities can fail silently. A hairline crack in a copper pipe under the slab can lose hundreds of gallons per day without any visible sign at the surface. The water has nowhere to go except laterally through the soil — until it finds a low point, and then it comes up through your basement floor or foundation wall, usually weeks later, usually in the worst possible place.
Mold doesn't wait for you to find the leak. It starts growing in 24 to 48 hours of standing moisture — inside wall cavities, under subfloor decking, in insulation bays. By the time you smell it, you've already got a remediation problem, not just a plumbing problem.
Slow leaks also attack wood. Floor joists and subfloor decking that stay damp long enough will rot. That's a structural repair, not a plumbing repair, and the bill changes accordingly.
Here's what a licensed plumber can do that you absolutely cannot do from the surface:
- Thermal imaging — a thermal camera shows temperature differentials through drywall. Cold, wet spots in a wall show up clearly even with no visible surface damage
- Pressure testing — isolate sections of the supply line and test for pressure drop, which identifies a breach even inside finished walls
- Video drain inspection — a camera down the drain line catches cracks, root intrusion, and frost damage in buried lines
The math is simple: a plumbing inspection costs $200 to $400. Undetected water damage restoration runs $1,000 to $10,000 or more, and that's before mold remediation. The inspection isn't a luxury — it's insurance against a much larger bill.
Not sure if your pipes made it through the freeze? We'll look — before a slow leak becomes a $10,000 problem. Book a post-winter inspection.
Older Homes: Why Your Pipes Are Playing on Hard Mode
The median American home is now 40 years old. About 35% of owner-occupied homes were built before 1970. If you're in Indianapolis or Chicago, those numbers likely skew older — not younger.
That matters because older pipe materials don't age gracefully.
Galvanized Steel (Common 1940s–1970s)
Galvanized steel corrodes from the inside out. Over decades, the interior diameter shrinks as scale and rust build up. By the time a pipe like this hits a freeze event, it doesn't have the wall thickness it had when it was installed. The pressure of expanding ice hits metal that's already been compromised. These pipes don't just crack — they can split.
Original Copper
Copper is more resistant to corrosion, but it's brittle at joints and solder points after decades of thermal cycling. Every time a pipe expands in summer heat and contracts in winter cold, those joints are stressed. A freeze event applies sudden, extreme pressure right at the spots that are already the weakest. Copper is the most vulnerable material to rupture during a freeze.
Mixed Systems (Chicago and Indy Specific)
Chicago's pre-WWII bungalows, two-flats, and greystones — and many of them still have original or patched plumbing. Cast iron drains. Galvanized supply lines. Copper add-ons from a 1970s kitchen remodel. These mixed systems are unpredictable in a freeze because the failure points aren't consistent throughout the house.
Indianapolis homeowners in Irvington, Fountain Square, SoBro, and Broad Ripple know the same profile. Pre-1960 housing stock, partial updates over the decades, and original pipe runs still buried in walls that were never meant to see another century of winters.
Rule of thumb: if your home is pre-1980 and you've never had a plumber assess the condition of your supply lines, this winter is the reason to schedule one.
PEX and modern CPVC pipe, by contrast, handle freeze events far better — they're flexible enough to expand without cracking. If you're still on galvanized or original copper, that's a conversation worth having with a licensed plumber sooner rather than later.

DIY vs. Call a Pro: Here's Where the Line Is
Not every problem needs a service call. Some of this you can handle yourself. But there's a clear line, and crossing it on the wrong side costs money.
Things You Can Do Yourself
- Replace a supply line under the sink (braided stainless, standard connection — a hardware store run and 20 minutes)
- Install foam pipe insulation sleeves on exposed lines in the basement, crawl space, or garage — under $2 per foot, available at any home center
- Check and document hose bibs and watch the water meter
- Monitor for new stains or changes — document everything with photos
Call a Licensed Plumber For
- Any sign of water behind a wall or ceiling — do not open drywall yourself until you know where the source is
- Reduced pressure throughout the house (not just one fixture) — this is a main line or widespread system problem
- Sewer smell from multiple fixtures — frozen or damaged drain lines
- Any visible pipe cracking, splitting, or joint separation
- Anything involving the main shutoff, the water meter line, or below-slab pipe runs
The Cost Reality
Emergency plumber during off-hours: around $150 per hour plus an after-hours surcharge. Most burst pipe repairs during business hours run $1,000 to $4,000. Add water damage restoration — another $1,000 to $10,000 or more — and you're looking at a very expensive decision to wait and see.
The cheapest call you make is the one before the ceiling comes down.
One more thing on insurance: most homeowners policies cover sudden and accidental burst pipe damage. They're less sympathetic about slow leaks you should have caught. Document everything before you dry it out, and call your agent before you start any major cleanup. A claim denied because you skipped documentation is a bill you pay entirely yourself.
Prepare for Next Winter
You've done the inspection. Now lock in the fixes so next February isn't a repeat. These aren't complicated — they're just the things most people skip until they have a claim.
- Foam pipe insulation sleeves on every exposed pipe run — crawl spaces, garages, under cabinets, utility rooms. Under $2 a foot at any home center. Takes an afternoon. Worth every minute.
- Set your thermostat floor at 55°F minimum — even when you're on vacation. Even when you're "just gone for the weekend." Your pipes don't know you're coming back Monday.
- Know where your main water shutoff is right now — not when water is pouring through the ceiling. Walk to it today. Make sure it actually turns. If it's stuck or corroded, add that to your plumber's list.
- Consider a leak sensor ($20–$50) — place one near your water heater, one under the kitchen sink, and one near the sump pump. They beep when they get wet. That beep at 2 a.m. is worth a lot more than finding the damage at 9 a.m.
- Drip faucets on exterior walls during hard freezes (below 20°F) — moving water is harder to freeze. It's a small waste. It's a lot cheaper than a burst pipe.
A licensed plumber in your area can assess and repair frozen or burst pipe damage before it gets worse. Find one on Saorr.
Ready to Find a Plumber — or Dealing With an Emergency Right Now?
You've done the walk-through. You know what to look for. Now it's time to connect with someone who can help.
🚨 Active Water Damage? Don't Wait.
If you've found a burst pipe, water coming through a ceiling, or visible flooding in your basement — shut off your main water supply right now (know where that shutoff is before you need it), then find an emergency plumber immediately.
Every hour of active water flow multiplies the damage. One inch of standing water in a home can cause up to $25,000 in damage — and the national average for a water damage or freezing insurance claim is $15,400. This is not a "I'll deal with it tomorrow" situation.
📞 Find an emergency plumber near you on Saorr →
✅ Not Sure If You Have a Problem? Book an Inspection.
If your walk-through turned up some warning signs — or if your home is pre-1980 and you want to know what you're actually dealing with before the next cold snap — connect with a local plumber for a post-winter inspection.
A licensed plumber can pressure-test your lines, use thermal imaging to spot hidden issues, and give you a straight answer: everything's fine, or here's exactly what needs attention and what it'll cost. No pressure. No upsell theater.
Water damage claims are the #2 cause of homeowner insurance losses in the country — 22.6% of all claims. About 1 in 67 insured homeowners files one every year. A quick inspection is the cheapest thing between you and joining that statistic.
📅 Find a local plumber for a post-winter inspection on Saorr →
Saorr connects homeowners in Indianapolis, Chicago, and surrounding communities with licensed, vetted local contractors. Browse plumbers near you and book directly.
Find Trusted Pros Near You
Ready to start your project? Connect with vetted, top-rated contractors in your area.
Get Started