Spring Outdoor Plumbing Checkup: What Every Indiana Homeowner Needs to Do Before April
Spring Outdoor Plumbing Checkup: What Every Indiana Homeowner Needs to Do Before April
Here's the thing about freeze damage to outdoor plumbing — it doesn't announce itself in January. The crack forms quietly when water expands inside a sillcock or lateral irrigation line at 2 a.m. on the coldest night of the year. The pipe holds. The ground thaws. You forget about it.
Then April rolls around. You flip on the hose bibb for the first time to wash your car. And somewhere inside your wall, water starts running where it absolutely should not be running.
That's how a $200 repair turns into a $15,000 insurance claim — and that's assuming your insurer covers the resulting damage, because they won't cover the broken pipe itself.
Indiana winters hit outdoor plumbing hard. Multiple freeze-thaw cycles all season long cause cumulative joint fatigue even when nothing fully bursts. More than 20% of homeowners deal with some form of outdoor plumbing damage in colder months. The good news is that a one-hour spring walkthrough — done right, in the right order — catches almost everything before it becomes a disaster.
This guide covers outdoor plumbing only: hose bibbs, irrigation systems, exposed pipes, and backflow preventers. We have separate posts for sump pumps and basement waterproofing. Let's stay focused on what's outside.

Why Spring Is the Moment of Truth for Outdoor Plumbing
Indiana's frost line sits at 36 inches — that's how deep the ground freezes in a typical Central Indiana winter, and it matches what Chicago suburbs deal with. Everything above that depth is vulnerable. Your outdoor faucets, your shallow irrigation laterals, any pipe running through an unheated crawlspace, garage wall, or on the north-facing side of the house — all of it spent the last four months under stress.
The sneaky part is micro-cracks. A hairline fracture in a brass sillcock body doesn't leak when the water inside is frozen solid. It holds. But the moment you restore pressure in spring — usually by reopening the indoor shutoff valve you (hopefully) closed last fall — that crack opens up under 40–80 PSI of water pressure. Now you've got a leak inside a wall cavity.
Timing matters too. Indianapolis's last average frost date is April 7. Most irrigation contractors and experienced homeowners wait until after April 15 to start up sprinkler systems, just to make sure overnight temps are consistently above 32°F. Start too early and you risk freezing a pressurized lateral line that cracked over the winter — and suddenly a $185 startup call turns into a $400+ zone repair.
Do your outdoor plumbing inspection in late March. Fix what you find in early April. Start your irrigation after April 15. That sequence saves money.

Spring thaw and heavy rains hit Indiana and Illinois hard. A failed hose bibb or backflow issue can escalate fast. Don't find out in April.
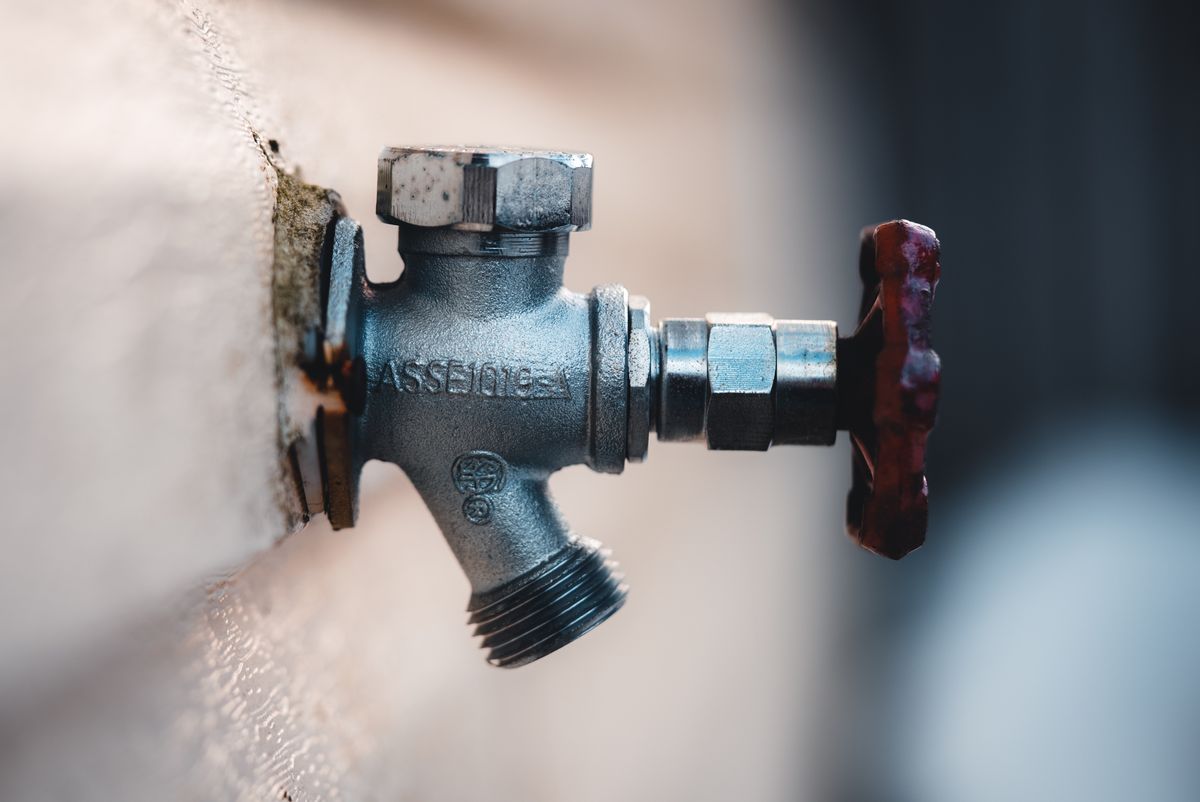
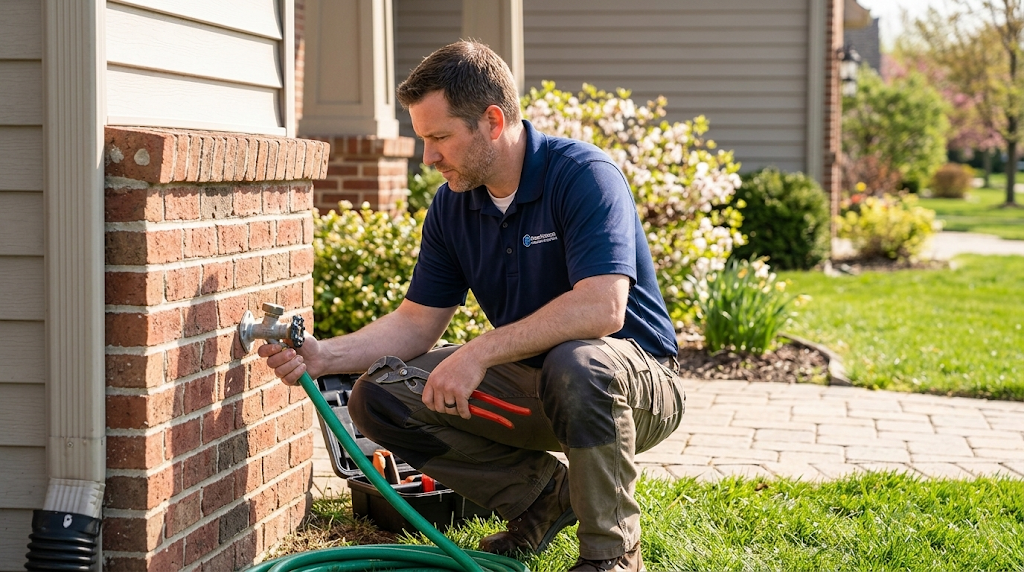
Step One: The Hose Bibb — Indiana's Most Overlooked Post-Winter Failure Point
Most homeowners walk past their outdoor faucets a hundred times a spring without a second thought. Here's how to actually check one properly — takes about five minutes per faucet.
Step 1: Find the indoor shutoff first. It should be on the pipe feeding the outdoor faucet, usually in the basement or crawlspace directly behind the exterior wall where the faucet lives. If you don't have one (or never closed it last fall), add that to your list of things to fix.
Step 2: Open the indoor shutoff slowly. Before you go outside, listen. Any gurgling, dripping, or hissing inside the wall is a red flag. Stop. Don't open it further. Call a plumber.
Step 3: Go outside and turn the faucet on. Watch for: water dripping from behind the faucet handle or from the wall itself; water seeping from the junction where the faucet meets the siding; reduced flow compared to what you'd expect. Let it run for 30 seconds.
Step 4: Come back inside while it's running. Check the ceiling directly below or behind the faucet. Check any exposed pipe you can see. Look for drips, wet insulation, or new rust streaks.
Step 5: Turn it off and check the weep hole. Most outdoor faucets have a tiny weep hole near the spout. After shutoff, a drop or two is normal — it's draining residual water. Steady dripping that continues past 30 seconds means a worn washer or, worse, a cracked valve body.
A worn washer is a DIY fix — $5 to $10 in parts, 20 minutes of work if you've done it before. A cracked sillcock body means a full replacement: expect $150 to $350 for a straightforward swap, up to $600 if access is difficult (stucco siding, finished wall, awkward pipe routing).
Frost-Proof vs. Standard Bibbs: One Detail That Changes Everything
If your house was built after the mid-1970s, there's a good chance your outdoor faucets are frost-proof (also called anti-siphon or freezeless bibbs). The difference matters.
A standard outdoor faucet shuts off right at the wall. Whatever water is in the pipe from there outward sits exposed to freezing temperatures all winter. If you didn't drain it — or if the indoor shutoff was never closed — that water freezes, expands, and can crack the faucet body or the pipe behind it.
A frost-proof bibb is built differently. The actual shutoff valve sits 6 to 14 inches inside the heated wall. When you turn it off, the water drains back toward the warm interior automatically. In theory, there's nothing left to freeze.
Here's the catch — and it trips up a lot of Indiana homeowners: if you left a garden hose attached over winter, the frost-proof protection is completely negated.
The hose creates a seal. Water can't drain back into the wall the way it's supposed to. The water in the pipe and the faucet body stays put, freezes, and you've got all the same problems as a standard bibb — except the failure point is now 8 inches inside your wall where it's harder to access and more likely to cause interior damage before anyone notices.
Every fall: disconnect and store your hoses. Every spring: if you left a hose attached, inspect that faucet extra carefully using the steps above.

A frost-proof hose bibb in spring-ready condition — when you reconnect a hose and turn the valve, check for drips at the fitting, handle stiffness, or any hissing. Those are your warning signs.
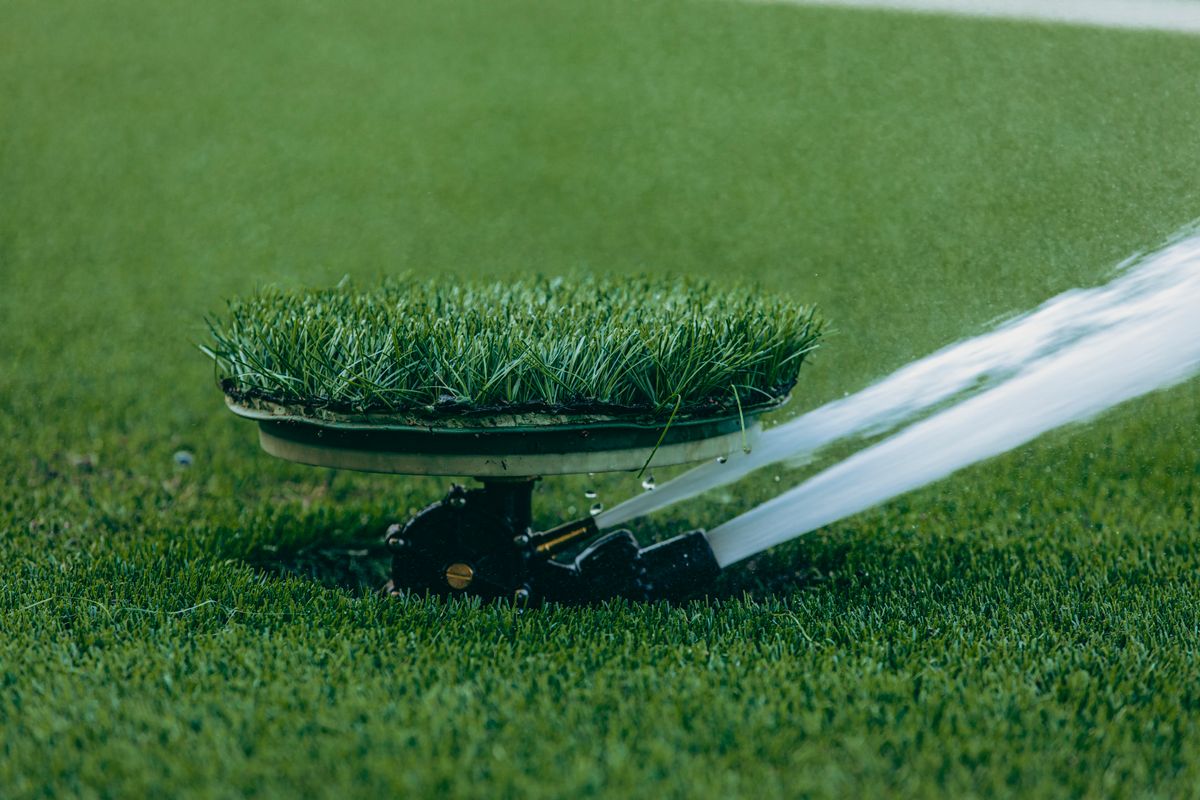
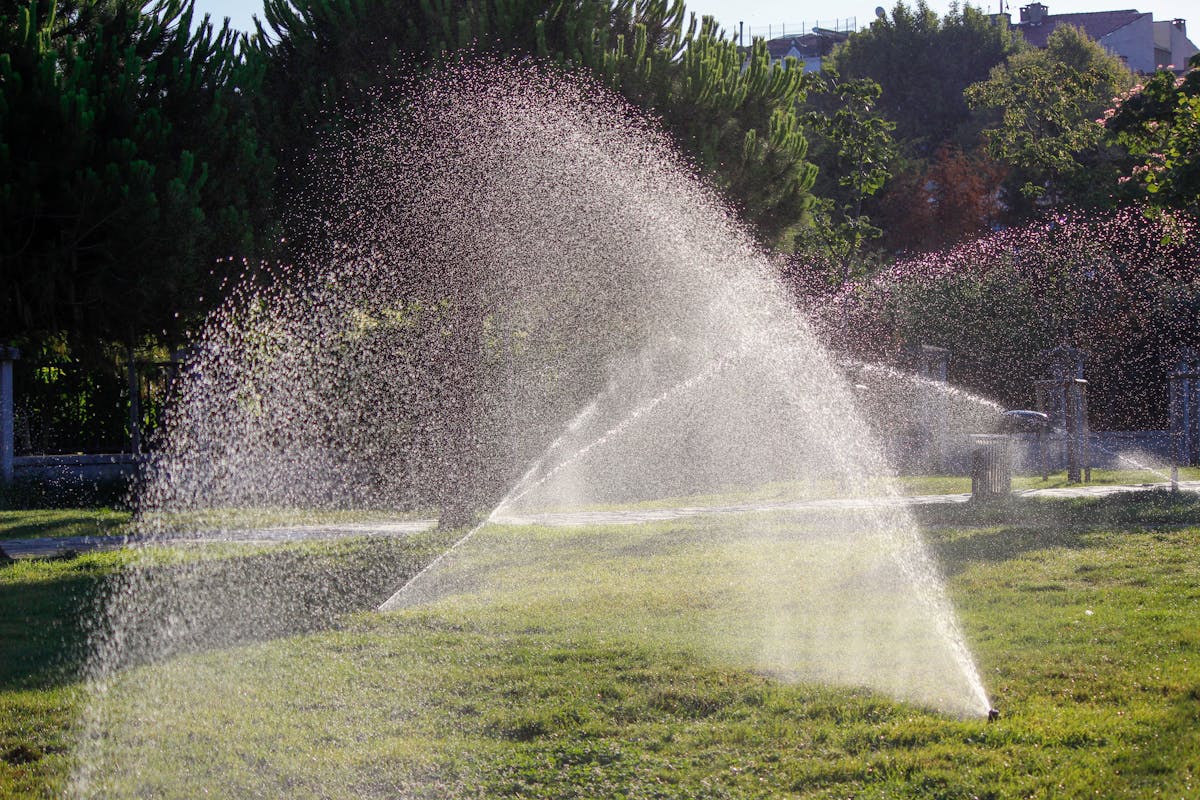
The Spring Irrigation Startup — What Can Go Wrong and When to Call a Pro
Irrigation startup is where a lot of homeowners either do things right or set themselves up for an expensive summer. The window for Indianapolis is late March through mid-April — once overnight temps are reliably above freezing, but before the grass actually needs water.
Here's what a proper startup involves:
- Slow pressurization of the system — not a sudden blast. Cracked laterals from the winter will show themselves; you want to find them with controlled low pressure, not a fully charged line.
- Zone valve check — each zone valve should open and close cleanly. A zone that won't close wastes water and kills your yard. A zone that won't open means a failed valve or a cracked line downstream.
- Head alignment and coverage check — winter frost heave moves sprinkler heads. Pop-up heads get buried, rotors get knocked sideways by snow removal. Walk every zone while it's running.
- Backflow preventer inspection — more on this in the next section, because it's important enough to get its own.
- Controller/timer check — confirm the schedule is correct for spring, zones are programmed right, and the rain sensor is functional.
- Pressure check — operating pressure for most residential systems should be between 30 and 50 PSI. Too high damages heads and shortens the life of the entire system.
The DIY risk during irrigation startup is pressurizing a cracked lateral line without knowing it. If a line cracked over the winter and you slam it with full pressure, you've now got a geyser in your yard — or worse, a slow subsurface leak that saturates your lawn's root zone and foundation for weeks before you notice. In-ground damage, depending on location, can run $100/hour in labor plus a $50 trip charge plus parts.
For most homeowners with more than 4 zones, hiring a pro for startup is a smart call. The going rate in the Indianapolis market for a startup + backflow test + full inspection runs around $185 for systems with up to 7 zones and $205 for 8–12 zone systems (based on current Indianapolis-market pricing). That's cheap insurance against a $400 surprise.
The One Outdoor Plumbing Item Indiana Homeowners Are Required to Test (And Almost Nobody Does)
Ask ten Indiana homeowners what a backflow preventer is. Maybe three can describe it. Ask how many have had theirs tested in the last year. You'll be lucky to find one.
Here's the short version: a backflow preventer is a device installed on your irrigation system's connection to the municipal water supply. Its job is to stop irrigation water — which has been in contact with fertilizer, pesticides, and soil — from flowing backward into the drinking water supply when pressure drops. Without it, every time the city main loses pressure, your yard water could siphon back into the neighborhood's drinking water.
That's why Indiana code requires backflow preventers on irrigation systems connected to municipal water. And that's why most Indiana municipalities require annual testing by a certified backflow tester — it's not just a recommendation, it's a legal requirement in most jurisdictions.
Almost nobody knows this. And the penalties for non-compliance range from fines to water service shutoff.
During your spring irrigation startup, the backflow preventer should be physically inspected for cracks, corrosion, or freeze damage. The valve bodies are exposed — they sit outside the wall, often above ground, and they're vulnerable. A cracked preventer body is a straight replacement job, not a repair. Cost varies by type and brand but budget $150–$400 for the device plus labor.
If your irrigation contractor isn't mentioning backflow preventer testing during your startup, ask. If they can't do it themselves, they should be able to refer you to a certified tester. This is not optional paperwork.

A multi-outlet irrigation valve manifold — assemblies like this require a properly installed and annually tested backflow preventer to keep fertilizer and soil contaminants out of your drinking water supply. Indiana law requires it.
What to Do If You Find Damage: DIY vs. Call a Plumber
Not everything needs a pro. Here's an honest breakdown:
| What You Found | DIY or Pro? | Typical Cost |
|---|---|---|
| Worn faucet washer — faucet drips when off | DIY | $5–$10 in parts |
| Irrigation controller reprogramming | DIY | Free |
| Sprinkler head knocked sideways or buried | DIY | $5–$20 per head |
| Cracked sillcock/hose bibb body | Pro | $150–$600 |
| Water stain on basement ceiling near outdoor faucet | Pro — today | Varies; don't wait |
| Damp drywall on exterior wall near spigot | Pro — today | Varies; don't wait |
| Sprinkler zone won't hold pressure or shut off | Pro | $100/hr + $50 trip + parts |
| Cracked backflow preventer body | Pro | $150–$400+ parts + labor |
| Exterior faucet has pressure but no flow | Pro — today | Blocked or cracked inside wall |
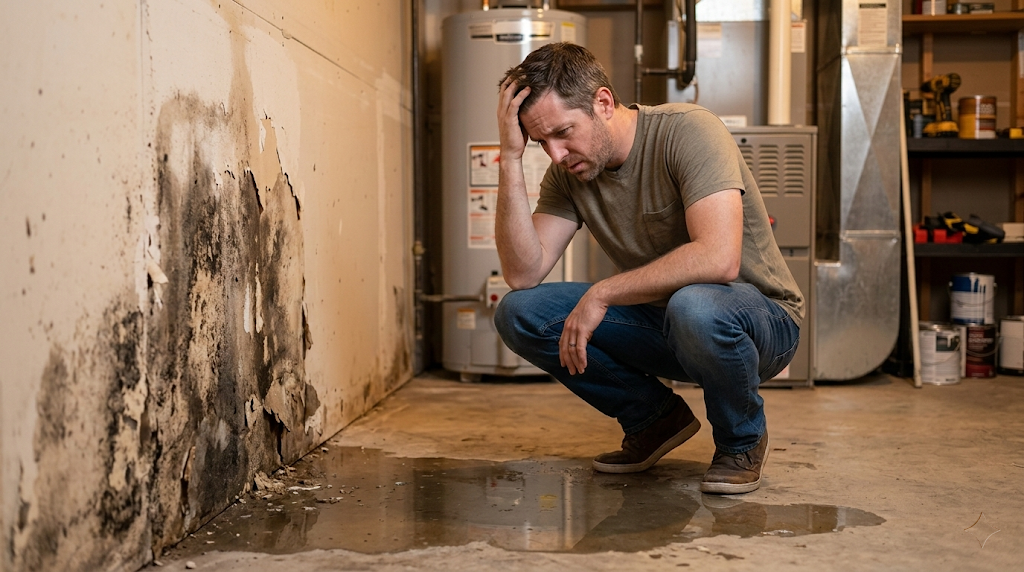
The short rule: anything involving water inside a wall, reduced flow where there used to be full flow, a zone that won't behave, or a cracked component — call a plumber. These are not situations where waiting a week makes sense. Slow leaks inside walls breed mold fast, especially in spring when everything is warming up.
What Your Homeowners Insurance Will (and Won't) Cover
This is the part nobody reads until they're on the phone with their adjuster, and by then it's too late to be useful information.
Water damage is the second most common homeowner insurance claim in the country — 28% of all claims according to the Insurance Information Institute. The average freeze-related water damage claim runs between $13,954 and $15,400. Those are real numbers.
Here's what most standard homeowners policies will cover: the resulting damage from a sudden, accidental pipe failure. Water-damaged drywall, flooring, furniture, structural framing — if it was sudden and you didn't know about it, you typically have a claim.
Here's what they won't cover: the broken pipe or faucet itself. The sillcock that cracked over winter? That's a maintenance item. Your policy doesn't pay for it. They also won't cover damage caused by a slow leak you knew about (or should have known about) and didn't fix.
Outdoor plumbing sits in a gray zone that confuses a lot of homeowners. A hose bibb that fails and sends water into a finished basement wall — the remediation costs ($1,500 minimum, often far more) may be covered, but only if the failure was sudden and you can demonstrate you didn't have prior notice. If you saw a drip last fall and didn't fix it, that's a different conversation with your adjuster.
The takeaway: do this inspection now, before there's a problem. Document what you find. Fix what needs fixing. If you do end up with a claim, you want to be able to show you maintained the system responsibly.
Book a Plumber Before the Spring Rush Hits
Every March and April, every plumber in Indianapolis books up fast. Homeowners who waited out the winter start calling all at once. Scheduling windows stretch out. Emergency rates kick in for jobs that could've been routine.
If your outdoor plumbing inspection turns up anything that needs professional attention — or if you want a pro to do the full inspection for you — the time to book is now, not after you've already turned on the faucet and found the leak.
Find a Plumber in Your Area — Before the Rush
Don't wait until April to find out your outdoor faucet cracked over the winter. Search vetted local plumbers on Saorr and get the job done right — while you can still get on someone's schedule.
Search Plumbers on Saorr →Local pros. Real reviews. No runaround.
Find Trusted Pros Near You
Ready to start your project? Connect with vetted, top-rated contractors in your area.
Get Started