Ice Dams: How to Spot, Remove, and Prevent Roof Damage Before Spring
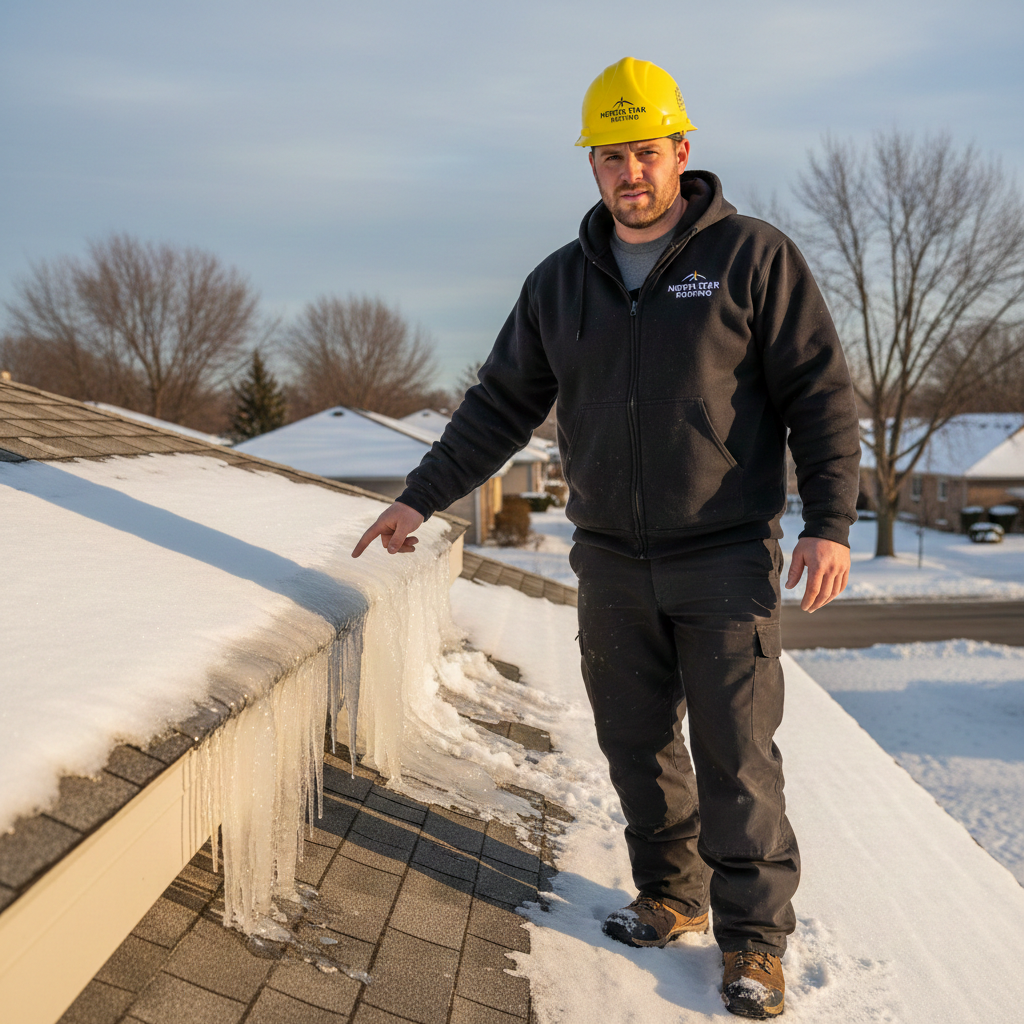
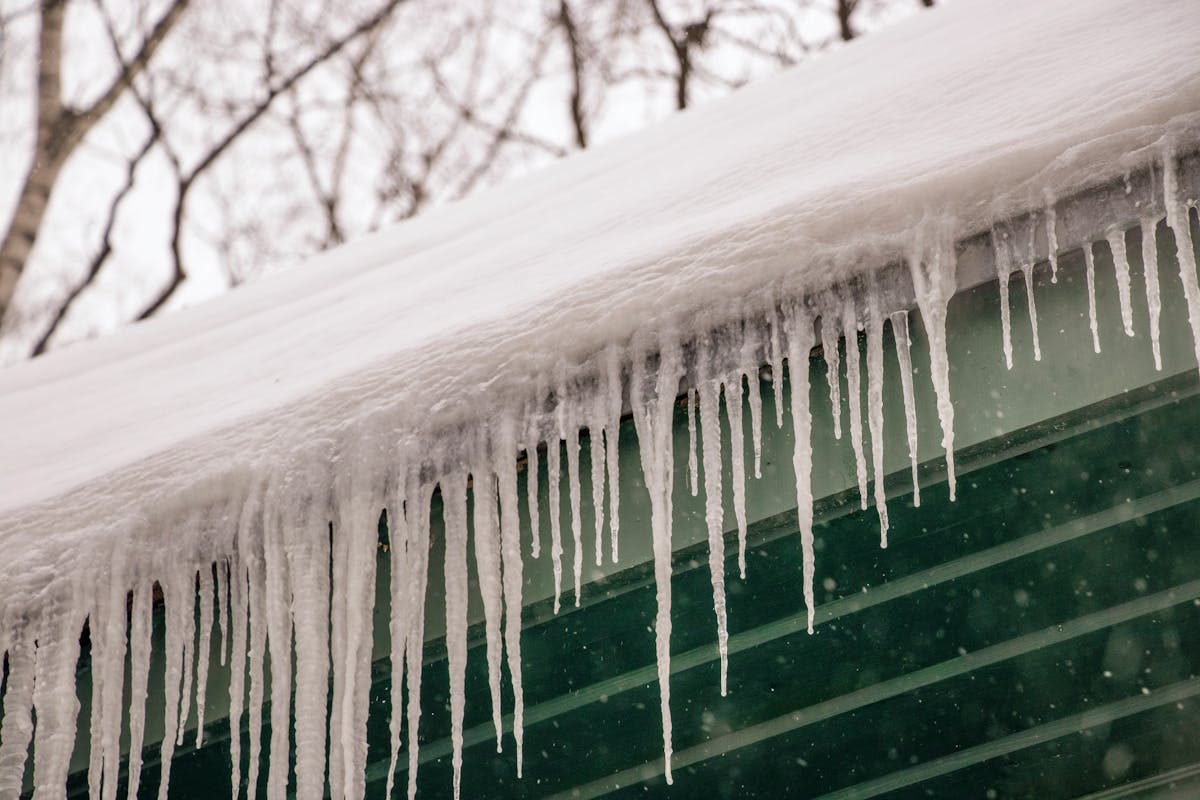
It starts innocently enough: a beautiful ridge of icicles hanging from your roofline, the kind that makes your house look like a winter postcard. But those icicles are often a warning sign—not a decoration. Behind them, tucked under your shingles, an ice dam may already be forming, silently forcing meltwater backward into your attic, your walls, and your ceilings.
For homeowners in Indianapolis and Chicago, February is peak ice dam season. Daytime temperatures creep above freezing, then plunge back down at night—the exact cycle that creates these destructive formations. Knowing how to recognize them, safely address them, and prevent them from returning can save you thousands of dollars in roof and interior water damage repairs.
What Is an Ice Dam and Why Does It Form?
An ice dam is a ridge of ice that builds up along the lower edge of your roof (the eave). Here's the process in plain terms:
- Heat escapes from your living space into the attic — often due to poor insulation or air sealing.
- That warm attic air heats the roof deck, melting the snow on the upper portion of your roof.
- The meltwater flows down toward the eave, which sits over the cold exterior wall — no heat below, so it refreezes.
- The ice builds up into a dam. Water backs up behind it, sitting on your shingles.
- Water finds its way under shingles, through seams, and eventually into your home.
This is why ice dams are fundamentally an insulation and ventilation problem, not just a weather problem. Two identical houses side by side in the same snowstorm can have very different outcomes depending on how well their attics are insulated.
How to Spot Ice Dam Warning Signs
Don't wait until you see water dripping from your ceiling. These are the early warning signs to look for:
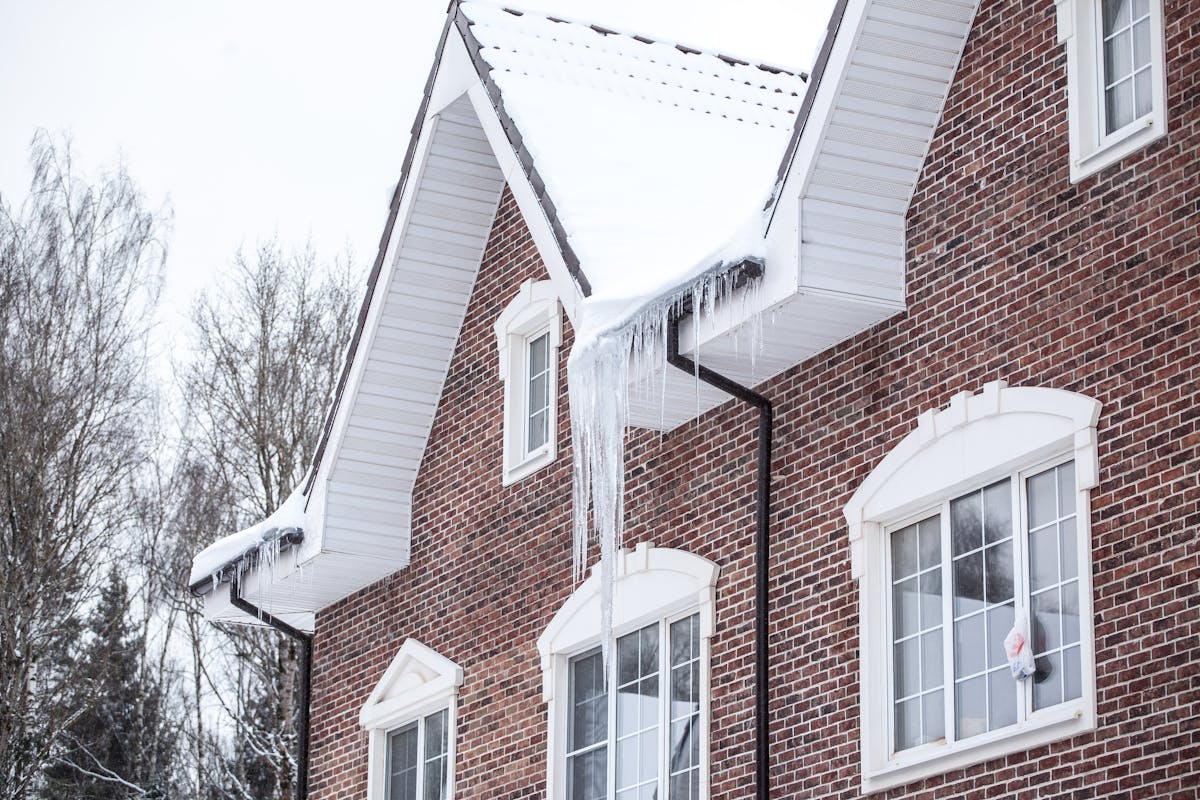
- Large icicles hanging from your gutters or eaves — especially if paired with a thick ridge of ice above them
- Uneven snow melt on your roof — if the upper portion clears while the lower stays snowy, heat is escaping unevenly
- Water stains on interior ceilings or walls near exterior walls, especially after a thaw-freeze cycle
- Peeling paint or bubbling drywall on exterior-facing walls — a sign of moisture intrusion that may have been ongoing for weeks
- Ice buildup inside your attic on rafters or the underside of the roof deck — check with a flashlight after a cold snap
In Chicago's older housing stock — bungalows, greystones, and two-flats — flat or low-slope roof sections are especially vulnerable to ponding from ice dam backup. Indianapolis homeowners with cape cod styles or bonus rooms above garages should pay close attention to those specific areas, as they're common ice dam hotspots.
What NOT to Do
When homeowners spot ice dams, the instinct is often to grab a hammer, a rake, or even a chainsaw. Resist that urge. These approaches cause more damage than the ice dam itself:
- Do not chip at the ice with sharp tools. You will damage shingles, and damaged shingles leak worse than ice dams.
- Do not use a heat gun or torch on shingles. Fire risk and shingle damage are both real outcomes.
- Do not attempt to climb a snow-covered, icy roof. Roof falls are a leading cause of home improvement injuries — every year in Indiana and Illinois, ER visits spike in February for exactly this reason.
Safe Immediate Fixes (DIY)
If you need to reduce ice dam pressure while waiting for a contractor, here are approaches that won't make things worse:
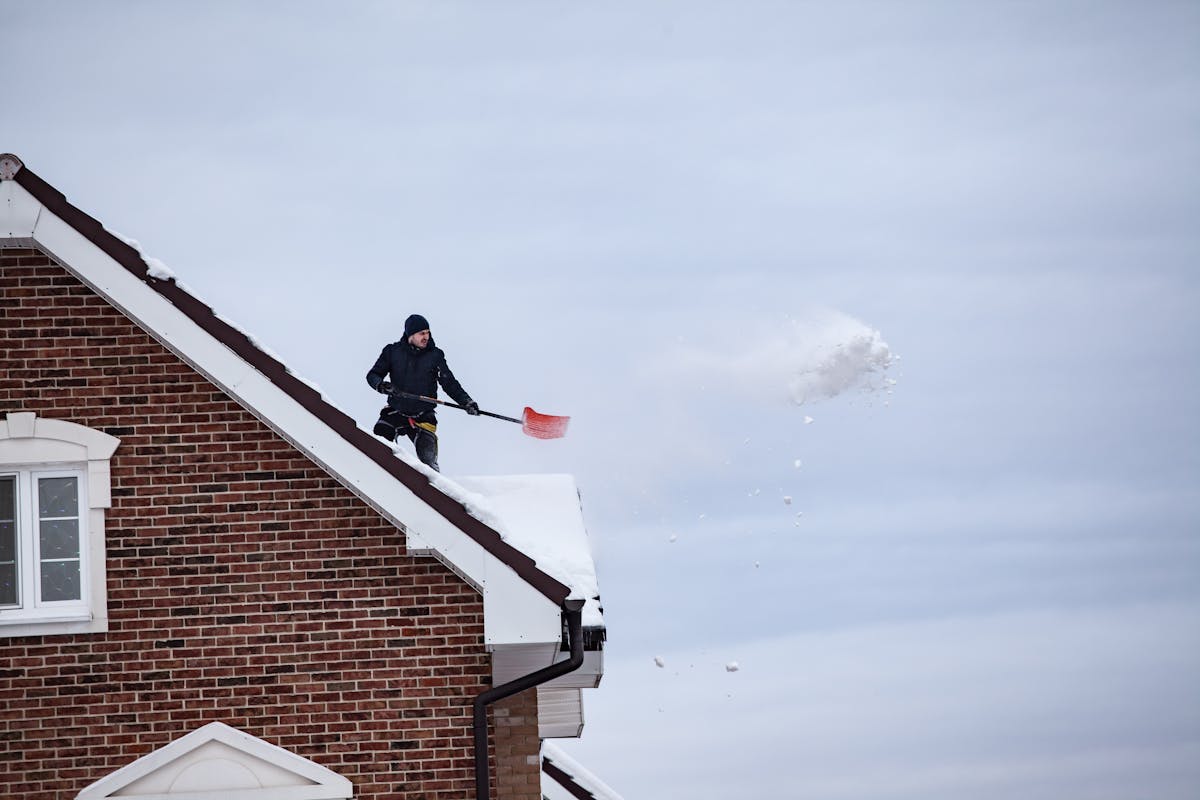
- Roof rake the lower portion of your roof — from the ground, using a telescoping roof rake, remove snow from the bottom 3–4 feet of the roof. This starves the ice dam of new meltwater.
- Apply calcium chloride ice melt in a nylon stocking — lay it perpendicular across the ice dam toward the eave. This creates a channel for water to drain. Do NOT use rock salt; it corrodes gutters and damages shingles.
- Run a box fan in your attic if you have access — pointed at the area where the ice dam is forming. Cold air in the attic slows the snow melt from underneath.
The Long-Term Fix: Attic Insulation and Air Sealing
Every ice dam is a symptom of heat escaping through your roof. The permanent fix requires addressing that heat loss:
- Add attic insulation — most Midwest homes built before 2000 are under-insulated. Current Energy Star recommendations for Indianapolis and Chicago call for R-49 to R-60 in the attic. Many older homes have R-19 or less.
- Seal attic air leaks first — insulation alone isn't enough. Gaps around recessed lights, plumbing penetrations, and the attic hatch allow warm air to bypass the insulation entirely. Air sealing is the highest-ROI step.
- Improve attic ventilation — proper soffit-to-ridge ventilation keeps the attic cold, preventing uneven snow melt. If your soffits are blocked by insulation, airflow is compromised.
- Install ice and water shield membrane — if you're re-roofing, make sure this membrane is installed at least 24 inches past the interior wall line. It's your last line of defense.
When to Call a Contractor
Call a contractor now — before spring — if any of these apply:
- You have active water staining inside your home
- The ice dam is more than 4 inches thick or spans your full eave length
- You have a flat or low-slope roof section with standing ice and water
- You want a proper energy audit and insulation assessment to prevent future dams
Professional ice dam removal is typically done with steam — a low-pressure, hot steam tool that melts the dam without damaging shingles. This is the industry-recommended approach. Expect to pay $300–$700 for a typical single-family home in the Indianapolis or Chicago area, depending on severity and roof pitch.
The insulation and air sealing fix typically runs $1,500–$4,000 for a full attic treatment, but most homeowners see the investment pay back within 2–4 heating seasons in reduced energy bills — plus the peace of mind of knowing their home won't spring a ceiling leak during the next February thaw.

A licensed roofer inspects ice dam damage along a residential eave. Midwest contractors recommend acting before spring thaw.
The Bottom Line
Ice dams are one of those home maintenance problems that feel invisible until they're catastrophic. By mid-February, Midwest homeowners have had a full winter of freeze-thaw cycles — and the damage, if it's happening, is already accumulating behind your walls. A quick walk around your home after the next snowfall takes five minutes and could save you a five-figure repair bill. Look for the signs. Act early. And if you see water inside, don't wait until spring to call.
Find Trusted Pros Near You
Ready to start your project? Connect with vetted, top-rated contractors in your area.
Get StartedRelated Articles

Spring Pest Control 2026: When to Spray, What to Watch For, and Why March Is Already Too Late to Wait
Spring Sprinkler Startup: What Irrigation Contractors Find Wrong Every Year (And What It Costs You)